Posted by: rusteddev | March 20, 2011

Check successful Heroku deployment with Cucumber & Selenium

Cucumber is a great tool to describe and test your Rails app behavior. In the project I’m working on, we do use it for acceptance testing and views testing (we use Rspec for Unit and Controller tests). After 4 months, we have nearly 400 rspec tests & 220 cucumber scenarios. But still it is not enough…..

Indeed, last week we deployed to our Heroku hosted production-ready environment and noticed a few hours later that we forgot to execute migrations…. Luckily the app is not public yet, but it will be soon…..So now how to be sure the app is running in production environment ?

I can’t execute my existing cucumber steps on production because they require test data (users, groups, etc…) and I can’t delete my database for that…. But I like the way cucumber is self explanatory and could help me in testing a “live” app. Below is a solution to running cucumber tests on heroku-hosted production app :

First, you need new testing scenarios. These will be simpler and won’t cover a feature in detail. They purpose is to check that the feature is available and running in production. Keep your detailed and large test for earlier stages. I also suggest to use selenium webdriver to run these test (instead of pure capybara) as it is the closest to what the “user” actually see.

@deploy @selenium
Feature: Smoke Test - Successfull deployment on production
  In order to test the application is succesfully deployed
  As a site admin
  I want to check a few features of the web site
  
  Background:
    Given the checked environment is determined
  
  Scenario: Acces web site
    When I go to the home page
    Then I should see "Welcome to my website"

Note the @deploy tag used to identify these “post depoloyment” or “smoke” tests.
The custom step Given the checked environment is determined holds the logic that configures cucumber to test the “real” web site. This is the code of the step :

Given /^the checked environment is determined/ do
  Capybara.current_driver = :selenium
  Capybara.app_host = CHECKED_APP.nil? ? "http://localhost:3000" : "http://#{CHECKED_APP}.heroku.com"
end

The CHECKED_APP variable is set up by the rake task that runs the feature (see below). It contains the name of the heroku app and thus the url of the web_site. This can be useful if you have others env on heroku that you want to smoke test.

Then you need a rake task to execute these steps. Here is the code of the deploy.rake task :

require 'rubygems'
require 'cucumber'
require 'cucumber/rake/task'

task :set_environment, :env do |t, args|
  CHECKED_ENV = args[:env]
  heroku_config = YAML.load_file(File.join(Rails.root, 'config', 'heroku.yml'))
  CHECKED_APP = heroku_config[CHECKED_ENV].nil? ? nil : heroku_config[CHECKED_ENV]['app']
end

task :deploy_and_check, :env, :needs => :set_environment do |t, args|
  begin
    sh "heroku maintenance:on --app #{CHECKED_APP}"
    #Do git push & migration here   
    sh "heroku maintenance:off --app #{CHECKED_APP}"
    Rake.application.invoke_task(:cuke_it)
  rescue
    puts "------------Error while deploying to #{CHECKED_ENV}"
  end
end

Cucumber::Rake::Task.new(:cuke_it) do |t|
  t.fork = false # You may get faster startup if you set this to false
  t.cucumber_opts = "--tags @deploy --format pretty"
end

There are 3 tasks :

  • set_environment: sets up the CHECK_APP variable reading the heroku.yml file. This file is coming from heroku_san gem. It matches an environment with an app_name here is an example
  • cuke_it: executes the cucumber features with @deploy tag
  • deploy_and_check: to deploy the app and execute the cuke steps. It could also include the logic to rollback migration and deployment if something happening.

Now, just run rake deploy_and_check[“production”] : it will deploy your app and execute the @deploy cucumber scenario on your “production” environment.

To be productive, my My RoR development environmment requires many windows to be opened simutanously. I also use the 4 Ubuntu workspaces.

This is how my everyday RoR working environement is set :

Workspace 1 : Eclipse RadRails. I don’t use terminals sub-windows  as it reduces the size of main window (the one displaying code).

Workspace 2 : Gnome terminals with Rails Console, Rails Server (WebRick),  Autotest, Spork (to improve tests performance), Cucumber (to execute User Acceptance tests), Git Gui (to commit, push and pull my changes)

Workspace 3 : 2 Firefox windows : 1 for web search and 1 for testing the web app

Workspace 4 : for my pro and personal mailbox, instant messaging.

I wanted to quickly open this environment at computer start-up so looked for a way to automate windows opening at startup. Two things were more tricky : set a title to a terminal window and move windows to one particular workspace. This is how I did.

To start a terminal and set a title :

  1. First you need to set up your profile so that title can be set using command line. To do this open a terminal (Ctrl-Alt-T), go to Edit, Profile preferences, “Title and command” tab and in the “When terminal commands set their own titles” choose “Keep initial title
  2. You may then use the following command line in a shell script to open a terminal with “rails_s” title and executing the rails s command. The maximize option is here to set the terminal full screen.
gnome-terminal -t rails_s -x sh -c "rails s" --maximize &

To move the opened terminal to a particular workspace :

I did not find a way to do this using gnome-terminal options. The only solution I found googling is to use devil’s pie. It’s an  utility designed to change the behavior of opened windows.

  1. Install devil’s pie by running the following command
  2. sudo apt-get install devilspie
    
  3. Create template file called terminal.ds for your terminal window and copy paste the following code :
  4. (if(is (application_name) "Terminal")(begin(set_viewport 2)(maximize)))
    

    note that this template applies to all windows named “Terminal” moving it to workspace 2 and maximizing it. set_viewport is the command to use instead of set_workspace when you use compiz.

  5. Start Devil’s pie to move windows to particular workspace. This should be done by script
  6. devilspie terminal.ds -d &
    gnome-terminal -t rails_c -x sh -c "rails c" &
    killall devilspie
    

    killall is important if you don’t want every new terminal window to be automatically moved once the script is finished. On the contruary, note that you might need to sleep a few seconds after executing slow-to-start application like Eclipse so that devil’ss pie is still running when the window is opened. This might require tunning.

Et voilà ! Adapt this script to your needs, run the script after startup and your environment is started.

Posted by: rusteddev | March 5, 2011

QuickTip : Eclipse – RadRails File Type Exclusion

As you project goes on, you keep adding source files and searching through the project becomes slower and slower. That’s even more obvious if you don’t filter some big files such as database or log files.

In Eclipse, in file search (Menu : Project, File Search or shortcut Ctrl-H) you exclude files from search by adding an exclamation mark “!” before the file type you want to exclude. File types separation is done using “,” . Example : this is how you would tell eclipse to search all files except in sqlite database and log files => *.*, !*.slqlite3, !*.log

Posted by: rusteddev | February 12, 2011

Scrum Question : Is it bad to fail a sprint ?

In my first agile days, I asked myself these questions . How bad it is to fail the sprint? What happens then ? How should the team member, Scrum Master or Product Owner act when it happens  ?

After month of practicing, I’ve come to this : I don’t think failing to deliver one, two or even all user stories of a sprint to be a bad thing. It’s a great opportunity actually. OK ….but let me be clear: Failing to deliver the software increment the team agreed at sprint planning is something to take into serious consideration. As an agile promise, the product owner wants to see constant delivery of features. By repeatedly not delivering what we agreed might lead to disappointment. Repeated disappointment can lead the PO to either change the team or stop the project. But nevertheless, this is why you should be “happy” (or I mean not so unhappy) to fail some user stories :

It’s the same for every beginning SCRUM team. If you fail (especially in early stages), it means you are just doing it right. Most of the teams fail their first or second sprint. And no team that I know did succeed every acceptance test in a product backlog. On the other side it is a shame not “playing” seriously and doing double estimates so that the team delivers whatever happens.

SCRUM is an empirical method ! It’s based on testing and adapting. Learning and constant improvement are part of the deal. Failing is the first and necessary step toward improvement. If you analyze what went wrong inside the team, define immediate counter actions and act accordingly in next sprints you will certainly avoid this failure int the future.
To have a less failure impact I suggest you should reduce the length of the sprint. it’s not such a big deal to fail in a 3 days sprint than a 3 weeks one. This way you also iterate more often, get more feedback and constantly improve the way you are doing things.

Failing the sprint make problems visible ! Failing might be a way to catch attention on something, expecting change.

In our team, we where a few weeks ago in the situation to “almost” finish the sprint. It was a tough sprint, we worked hard and did home working…. By “almost” finish I mean we were close from a customer point of view, and we could have ended up on time with all acceptance test passed. But we could never be “done” according our definition of done. The team agreed not to submit the user story on sprint demo. More than our will to be honest with ourselves and the PO, we did also this to catch up more attention on us.

Until then the team was doing pretty well and did not fail a single user story. From the outside, things were going well. Management was not responding to our request of adding some technical expertise. By failing to deliver expected result, we immediately catched up attention of PO and Management of the company. They were aware and were looking for solutions.

We did a proper retrospective just after and suggested ways of improvement. Among other things we should also need technical support especially in Tests Driven Development as we failed but still wanted to deliver high quality code.

A few weeks ago 2 experienced dev joined the team. If we decided to go on, and submit the user story to PO acceptance tests, maybe they would have passed. But we would have cheated PO, delivered crap, continued working extra hours, not obtained reinforcement and have 100% chances to go on like this as everything would have been OK from an outside point of view…

Today’s post is about Behaviour Driven Development. I’ll try to show you how to proceed with BDD on a basic feature : authentication. For this I’ll use  two helpers :

  • Nifty Authentication, one of the Nifty generators provided by Ryan Bates (you’ll probably know him and his popular RailsCast). It’s very simple to use and implements some good practices : crypted password, password confirmation, etc…
  • Cucumber, a Testing Framework that helps you define and run automated functional tests using plain text (User Stories like features description and Acceptance Test like scenarios).

Let’s begin :

  1. Set up the environment :
  2. Generate your rails 3 app, I’ll call mine bdd :

    rails new cuketest
    

    Then edit your Gemfile file to add the required gems, add the following lines :

    gem 'nifty-generators'
    group :development, :test do
     gem 'cucumber'
     gem 'cucumber-rails'
     gem 'rspec'
     gem 'rspec-rails'
     gem 'capybara'
     gem 'database_cleaner'
     gem 'launchy'
    end
    

    then let rails do the magic and install the missing gems :

    bundle install
    

    After that you need to configure your app to run cucumber, we’ll use capybara and rpsec framework to execute our cucumber tests.

    rails generate cucumber:install --capybara --rspec
    

    Ok, enough config, let’s move to code …. hum…. no …. to TEST !

  3. Describe the behavior :
  4. Create a new .feature file in the /feature directory. It will contain a description of the authentication feature and a test scenario. Let’s call it authentication.feature. The feature is described like User Stories in Scrum : In order to <purpose> As a <user> I want to <description_of_feature> The text is just for information. For  scenario, it’s a little bit different, it is still described in natural language but it’ll be interpreted by Cucumber to actually test the behavior. The scenario is described using this pattern Given <Before_situation> When <Action_tested> Then <Resulting_situation> This is the feature and scenario we want to test :

    Feature: Authentication
      In order to use bdd app
      As a visitor
      I want to be able to log in
    
    Scenario: Login
      Given I am not logged in
      When I go to the signup page
      And I fill in "user_username" with "user"
      And I fill in "user_email" with "user@gmail.com"
      And I fill in "user_password" with "passwd"
      And I fill in "user_password_confirmation" with "passwd"
      And I press "Sign up"
      Then I should see "You are now logged in."
    

    Now let’s try it : run the test with cucumber and see what happens….

    cucumber features -P
    

    Guess what ? It fails…. how else could it be, we didn’t code anything.Cucumber Feature Test : undefined step

    You can see from the output that cucumber found a scenario and executed it, but failed on first step “Given I’m not logged in” saying “undefined” step. We should tell cucumber how to be sure we are not logged. We’ll need to define a custom step.

  5. Define the steps :
  6. Go to the folder features/step_definitions and create a new file called authentication_steps.rb. Add dthe following content :

    Given /^I am not logged in$/ do
    visit("/logout")
    assert page.has_content?('You have been logged out.')
    end
    

    Test failed: great we can now code the logout !

    Now the color changed, it’s not brown anymore, it’s red. From undefined the step “Given I’m not logged in” is now defined and test failed. Other steps are still skipped.

    We must now code the step in order to logout.

  7. Code the feature :
  8. To deal with authentication we use nifty generators. We add the following line in the Gemfile :

    gem 'nifty-generators'
    

    Now we call the generator to create

    <pre>rails g nifty:layout
    rails g nifty:authentication
    

    OK ! well done, with this 2 lines you’ve done a pretty good work :

    with the first you created a simple css, application layout

    with the second authentication models, views, controllers, migrations, tests and configured Gemfile and routes. Everything needed to run a nice login and register feature.

    It’s almost done.

    Just execute migration and clone the dev to the test database :

    rake  db:migrate
    rake db:test:clone
    

    As we don’t want to see the default ruby home page, we should remove public/index.html and redefines route. Uncomment the following line of config/routes.rb and generate welcome controller

    root :to => "welcome#index"
    
    rails g controller welcome index
    

    Now run “rails server“, open you favorite web browser on http://localhost:3000 and try /login /logout.

    Ok now run again :

    cucumber features -P
    

    See the difference, now it’s all green ! Well done !

    Cucumber test all green : Great ! now Refactor

    In fact, it was a little bit to easy because we used nifty and everything run out green quite quickly (I helped a bit…). In the real world, they can be many failed attempts before all turns green.

That’s how Test Driven Development – TDD works :

  1. Define the test
  2. Make it fail : RED
  3. Make it run : GREEN (might take some time…)
  4. Refactor : optimize code and be sure to keep the test green.

So now go on and continue with Refactoring. It’s god time to optimize your code, make it clean and readable.  The test that took some time is now a good help, because running the simple “cucumber features -P” you’re it’s still working.

When you’re done try creating a new feature test (to check the password has min 4 characters). See it fail and enjoy seeing it turn to green.

Repeat and fade…..

Cucumber is great because this it’s behavior testing. Enough of boring Unit tests. You test the whole thing from database, to user interface and web sessions. You test what your customer really wants to see working. It’s not linked to the technical implementation. Who cares you coded this function using lists or hash tables, what does it change from a customer point of view ?

Cucumber is very easy to understand, you can even write tests side by side with your Product Owner. Existing steps using capybara are great and can be easily extended with custom steps to test everything.

That’s the end of my post. Go on with TDD and BDD, Cucumber is good for you !

Posted by: rusteddev | November 6, 2010

Add custom ringtones to your iPhone for free

Hey, quick tip to all iPhone user who want to add their own iPhone ringtones without paying for it.

Very simple :

  • Choose the MP3 sample you want to use as ringtone. No matter lenght or size, we will take care of this.
  • Open your mp3 with iTunes
  • Right click, and choose “Get Info”, then in option tab check and adapt Begin and End Timeframe. The total duration should be 40sec max. Ckick OK.
  • Right click again your song and choose “Convert Selection to AAC”. A new file should be created with exact given duration. You should ear a familair sound (iPhone default  new message beep).
  • Open this file in a browser. While in iTune, you can right click the song and choose “Open in File Explorer”.
  • Change the extension from .m4a to .m4r (r is for ringtone). Double click on this file to open it with Itunes, it should appear in the “Ringtone” folder.
  • Sync your iPhone
  • On your phone, go to Settings, Sound,  Ringtone and choose the new one should be just here.

That’s all !

With this technique, there is no need to use apps like iPhone Ringtone Maker, emicsoft iphone manager or MakeiPhoneRingtone neither to buy ringtones.

Posted by: rusteddev | October 22, 2010

Rails 3.0 Dev Environment

Following my newbee’s tutorials on Rails, I’ll explain how to set up a Rails Dev Environment on Ubuntu 10.04.

My choice goes to Apatana Rails 3.0 (still in beta).

  • First install Eclipse

sudo apt-get install eclipse

this will install > 400 Mo of disk space. Start Eclipse.

  • Install Aptana Studio 3.0 beta : Can follow instructions here. You need to re-start eclipse for changes to work.

You can also install Aptana studio 3.0 as a standalne application (bundled eclipse + aptana plug-in), but I prefer to separate both in case I’m also playing with Java.

You’re done ! Start creating a new “Ruby / Rails” project

Posted by: rusteddev | October 9, 2010

How to – Install Community Engine

Hi there,

I’m testing RoR Social Web / Community frameworks and tools. I found plenty of them, to name a few :

Today I’ll explain how to install Community Engine on a basic RoR install.

There is an install doc here, but I’d like to add a few things. The automatic install script did not work for me.

Before we start : be sure to use Ruby 1.8.7 & Rails 2.4.7. For Rails required version is documented but nothing about ruby version. I spent a few hours trying to make it work with 1.9.2. I suppose it is also because of Rails 2.4.x only compatible with 1.9.1. If you have to change ruby version after gem import (meaning you didn’t listen to what I said above…), you might need to uninstall and reinstall. This was required for hpricot, sqlite3-ruby and rmagick.

Here is what I did :

  1. First create your rails app like this :
  2. rails comengtest
    
  3. Install required libraries for rMagick
  4. sudo apt-get install imagemagick
    sudo apt-get install libmagick9-dev
    
  5. Install required gems, do not use sudo (here is why). I don’t install s3 cause I don’t need this feature for my sample.
  6.  gem install desert hpricot htmlentities rmagick haml calendar_date_select ri_cal authlogic searchlogic icalendar
    
  7. Install community engine plug-in from source code using git. You should be in your app root directory :
  8. git clone --depth 1 git://github.com/bborn/communityengine.git vendor/plugins/community_engine
    

    this will download the source from github and put it in the plugin directory of your just created rails application.

    Then you can create a git submodule so that you include latest version:

    git init
    git submodule add git://github.com/bborn/communityengine.git vendor/plugins/community_engine
    git submodule init
    git submodule update
    
  9. Configure your app :
    • Remove public/index.html
    • Modify the/config/environment.rb, highlighted lines should be added   :
  10. RAILS_GEM_VERSION = '2.3.4' unless defined? RAILS_GEM_VERSION
     require File.join(File.dirname(__FILE__), 'boot')
    require 'desert'
    
     Rails::Initializer.run do |config|
       config.plugins = [:community_engine, :white_list, :all]
       config.plugin_paths += ["#{RAILS_ROOT}/vendor/plugins/community_engine/plugins"]
       config.gem 'calendar_date_select'
       config.gem 'icalendar'
       config.gem 'authlogic'
       config.gem 'searchlogic'
    config.action_controller.session = {
    :key    => '_your_app_session',
    :secret => 'secret'
    }
    # more stuff here...
    end
    # Include your application configuration below
    require "#{RAILS_ROOT}/vendor/plugins/community_engine/config/boot.rb"
    
  11. Add the following line to your config/environment.rb, test.rb, production.rb. Even if you are not planning to deploy into every environment it is important for tests. You can also put this line in environment.rb for convenience.
  12. APP_URL = "http://localhost:3000" #(or whatever your URL will be for that particular environment)
    
  13. Add the following line to your config/routes.rb :
  14. map.routes_from_plugin :community_engine
    
  15. Generate Database migration scripts like this :
  16. script/generate plugin_migration
    rake db:migrate
    
  17. Change application.rb file if you’re not using session cookies
  18. # Uncomment the :secret if you're not using the cookie session store
    protect_from_forgery # :secret => 'your_secret_string'
    
  19. Now it is time to test that everything is up and ready. Use this :
  20. rake test
    rake community_engine:test
    

    I experienced an error on test : test_should_get_ical(EventsControllerTest): NameError: Constant RiCal from ri_cal.rb not found You can correct this by adding require ‘ri_cal’ at the beginning of app/controllers/events_controller.rb More details here

  21. Start server
  22. ./script/server
    
  23. Go to http://localhost:3000, and  browse the site :


Your free & full featured social site up and running


Posted by: rusteddev | October 8, 2010

How to – Create your first Rails App

Today, I’ll tell you how to install Ruby On Rails on Ubuntu. It’s quite simple if you follow this steps and are aware of some tricks.

Prerequisites are :

  • Ubuntu 10_04 (Lucid Lynx)
  • Internet Connection (for updates of packages and gems)

Here it is :

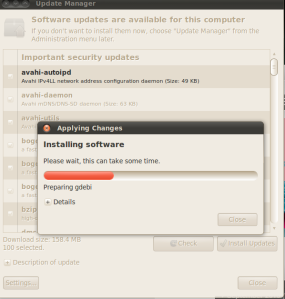
  1. Update your system to download latest versions of packages. Go to System / Administration / Update Manager. In Tab Ubuntu Software Make sure you have Community-maintained Open Source Software (universe) checked. Check Install updates. Restart if needed.

    Update your packages to last version available

  2. You can also update with command line using :

     sudo apt-get update
    
  3. Install complementary tools :
  4. sudo apt-get install curl git-core build-essential zlib1g-dev libssl-dev libreadline5-dev
    
  5. Now we will install RVM (Ruby Version Manager) which will be used to install ruby. The following command will download last version from git and install it. More info here.
  6. bash < <(curl -s https://rvm.beginrescueend.com/install/rvm)
    

    Add the following line in your .bashrc file : this will make your rvm usable. Without this you will get a No command ‘rvm’ found message. Don’t forget to restart your terminal window.

    [[ -s "$HOME/.rvm/scripts/rvm" ]] && . "$HOME/.rvm/scripts/rvm"  # This loads RVM into a shell session.
    
  7. Then you can install last ruby version 1.9.2. DO NOT USE sudo with rvm. When using sudo you are considered as root and gems for instances do not go in the expected directory. It becomes quickly a mess. See here for explanations. Have a coffee as it takes a while…
  8. rvm install 1.9.2
    

    and then this to set default ruby version as 1.9.2.

    rvm 1.9.2 --default
    

    at any time, check ruby version with ruby -v

  9. Now time as come to install rails. I suggest using gem. Don’t press Ctrl-C to fast as gem is not verbose by default. Let it be :
  10. gem install rails
    

    You can append –version 2.3.4 if you want a specific version of rails. Type rails -v to check if the good version is succesfully installed.

  11. Now you can try your first app :
  12. mkdir $HOME/workspace
    cd $HOME/workspace
    rails mytestapp
    

    Rails will show you the files created.

  13. Then run the web server : depending the version of Rails you should use :  ./script/server from mytestapp home dir if you have 2.3.4 rails or rails server if 3.0.0. Go to the URL indicated and you should see this :
  14. Your rails app is up and running !

    Great ! but if you try to click on “About your software environment” link : it will fail.

    Error using test app

    That’s because your database is not ready, see the server log.

    Error in server log : No Such FIle To Load sqlite3

    To correct this :

  15. Install libraries :
    • Ruby v1.9.1 is not supported and throw you segmentation faults. Do Not use it.
    • Your firewall might be annoying : to pass firewalls : Use -p http://your_proxy:port parameter with gem or apt-get
  16. sudo apt-get install sqlite3 libsqlite3-dev
    gem install sqlite3
    

    Start again your server. You’re done. Rails is OK and you can follow rails suggestions and start modifying your app (migrate data, modify routes, pratice scripting and tests…).

    And one more thing….. keep this in mind  :

Posted by: rusteddev | September 27, 2010

BizTalk 2010 Mapper Killing Feature : Search

Today I used BizTalk 2010 Mapper for first time, and faced a really improved mapper.

I used the search feature that let you search for strings in schemas element, attributes or nodes.

BizTalk Mapper Search Feature

Found string is highlighted in schemas, so you don’t harmfully spend time looking for it.It is very useful for EDI mapping or (like for me) annoying verbose maps like SAP Idocs ones. This is a simple but very interesting feature that really improves developer productivity as well as keeping them in good mood.

Great job Microsoft guys !

Older Posts »

Categories